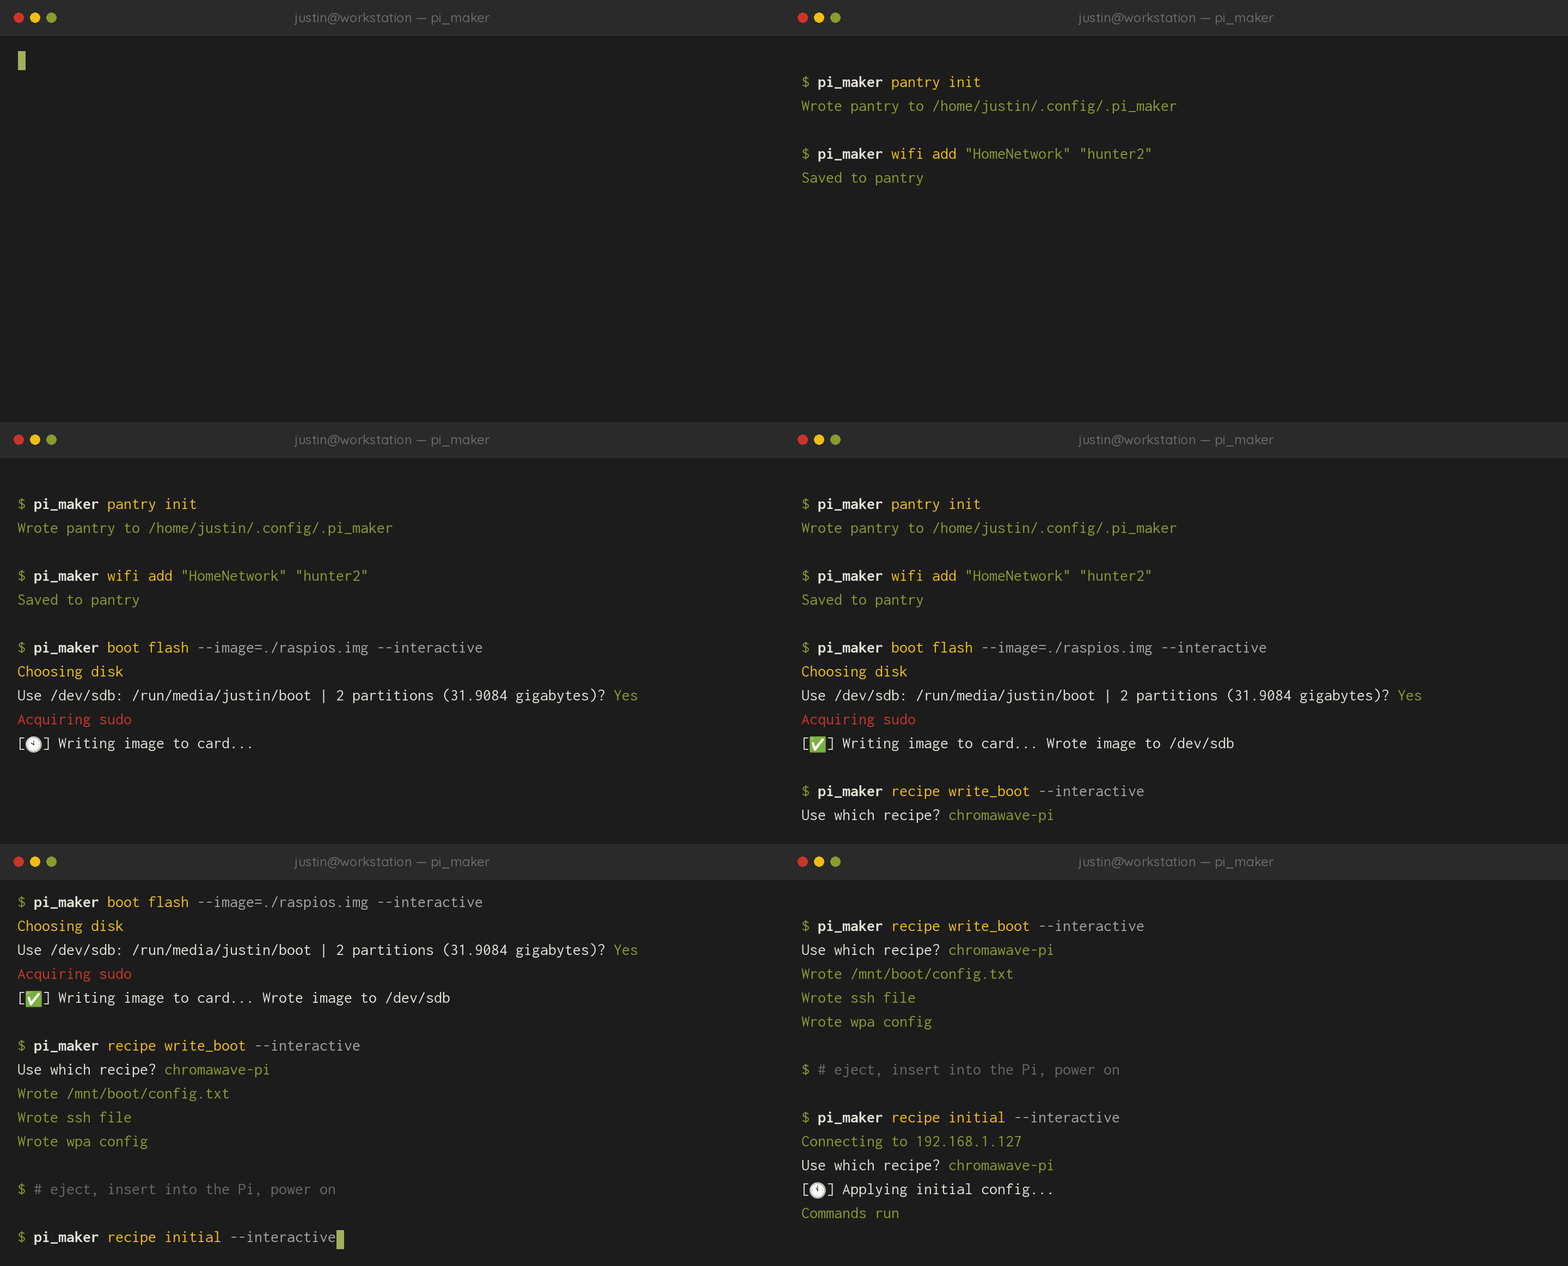
Every Raspberry Pi project starts the same way. Flash a card, enable SSH, get wifi credentials onto the boot partition, find the thing on the network, set a hostname and password, turn on SPI or I2C, install a Ruby, install packages, clone some dotfiles. It's an afternoon, it's near-identical every time, and six months later when I start the next project I've forgotten half of it and my notes have gone stale.
PiMaker turns that into a file. A recipe describes what a Pi should be, and the CLI applies it — flashing the image, writing boot configuration to the card, finding the device once it's up, and running the setup over SSH.
pi_maker pantry init
pi_maker wifi add "MyNetwork" "password"
pi_maker boot flash --image=./raspios.img --interactive
pi_maker recipe write_boot --interactive
# eject, insert into the Pi, power on
pi_maker recipe initial --interactive
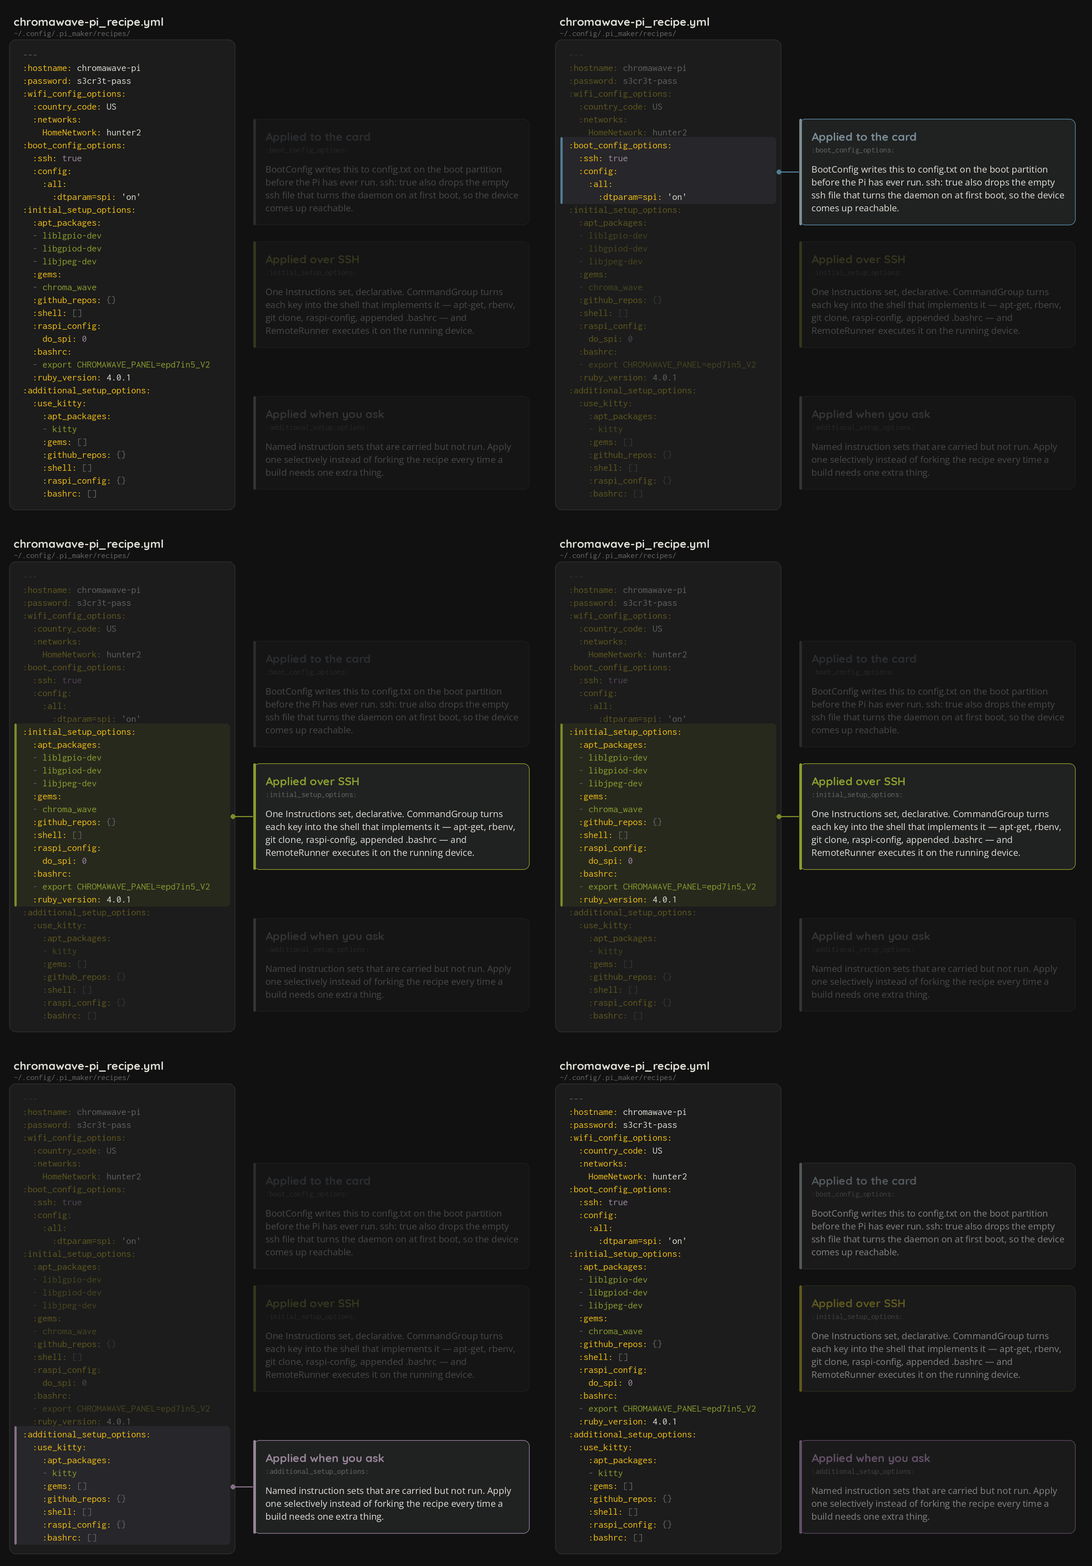
Recipes and the pantry
A Recipe binds together a hostname and password, wifi configuration, boot config, and one or more Instructions sets. Instructions are declarative and cover the things I always end up needing: apt packages, system gems, a Ruby version via rbenv, GitHub repos to clone with post-clone commands, raw shell, raspi-config settings, and chunks of text to append to .bashrc. Recipes can also carry named additional instruction sets to apply selectively.
Recipes live in a Pantry, which serialises to YAML and is discovered by looking in the current
directory, then home, then ~/.config/pi_maker. Wifi networks are stored on the pantry rather than per-recipe, so recipes reference a network by name and don't restate credentials.
Credentials
Recipes contain wifi passwords and Pi login credentials, which makes a pantry a file full of
secrets sitting in a home directory. FileEncrypter handles that, where pantries and individual recipes can be written encrypted and decrypted on read, and WpaConfig#to_h redacts passwords unless you explicitly pass a flag asking for them. Small thing, but it's the difference between a config format you can keep around and one you have to remember not to commit.
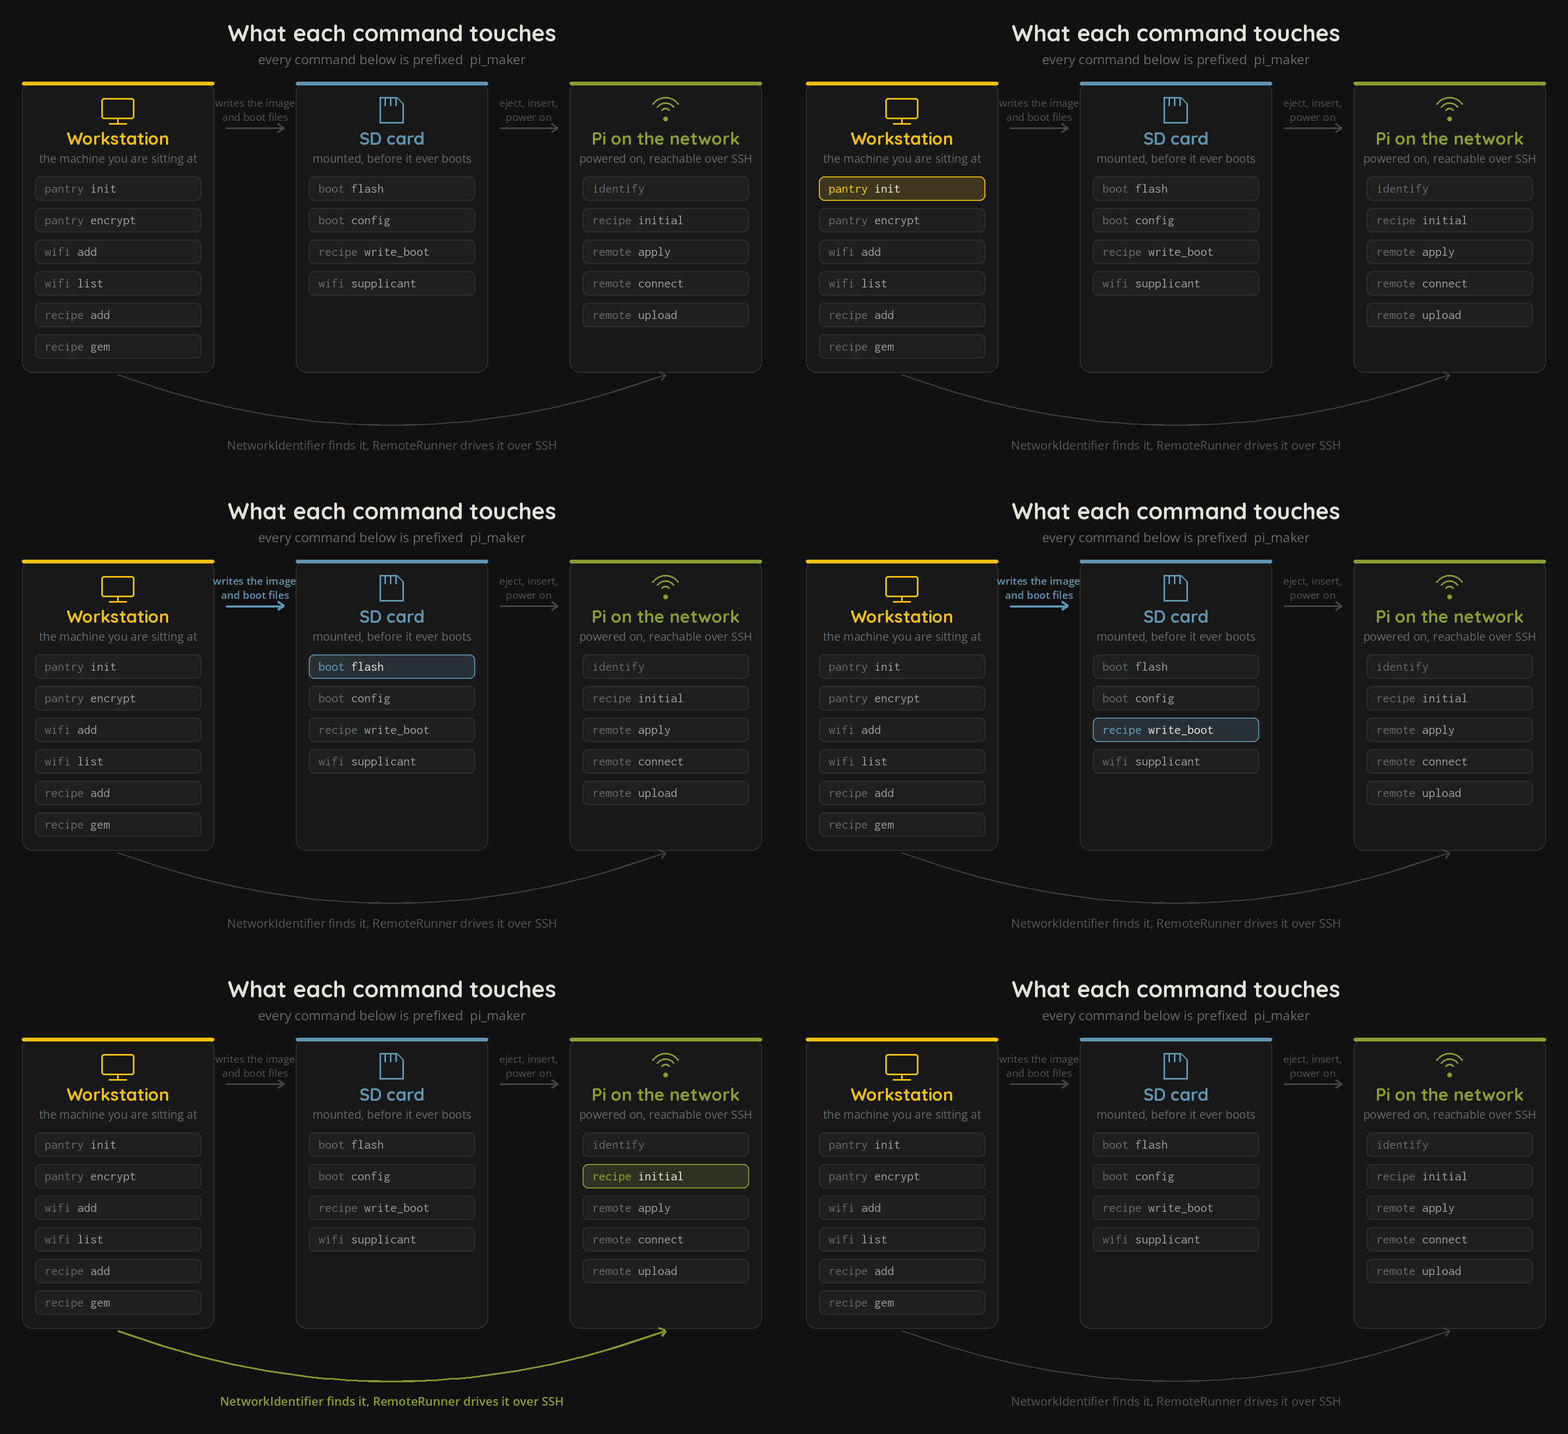
Running from the workstation
PiMaker runs from the machine you're working on rather than from the Pi, which means dealing with the fact that macOS and Linux disagree about nearly everything to do with removable disks. DiskManagement picks a protocol based on host OS and forwards calls to it, so listing devices, unmounting and writing images look the same from the caller's side. Flashing is a FlashingOperation you kick off and poll rather than a blocking call, because writing an image takes long enough that blocking is the wrong default.
The genuinely awkward moment in Pi setup is just after first boot, when the device is on the
network but doesn't yet have the hostname you're about to give it. NetworkIdentifier scans for it using arp by default, or nmap and the scan program, the output parser and the result filter are all injectable, so pointing it at something else is a lambda rather than a fork.
From there, CommandGroup turns declarative instructions into the shell that implements them, and RemoteRunner wraps net/ssh and net/scp to execute that on the target, with file uploads and downloads alongside.
Gems that describe their own hardware
What I actually wanted from this was for a gem to be able to state what a Pi needs in order to run it. pi_maker recipe gem chroma_wave reads a recipe out of the ChromaWave gem itself and builds a configuration from it: SPI enabled, the GPIO and SPI backend libraries installed, a build toolchain, the optional image and font libraries, and the gem. Someone who wants to drive an e-paper panel shouldn't have to work out whether they need lgpio, libgpiod or libbcm2835, because the gem that needs them can say so.
This is the case study for the system. Describe what is needed in the gem when you publish it, and downstream consumers can create profiles instantly.